
Well, Although I am waiting on some silicone additives (tints and flocking) to give my appliances a more realistic look, I decided it was time to do a test cast to determine how much silicone would be required for my nose prosthetic.
The first step was to prepare the mould with a release agent to make it easier to get the silicone out. Since I have a limited budget I decided to use Vaseline applied with a brush and then heated with a heat gun to liquid state which the hydrocal can absorb – all excess was then wiped away with paper towel.

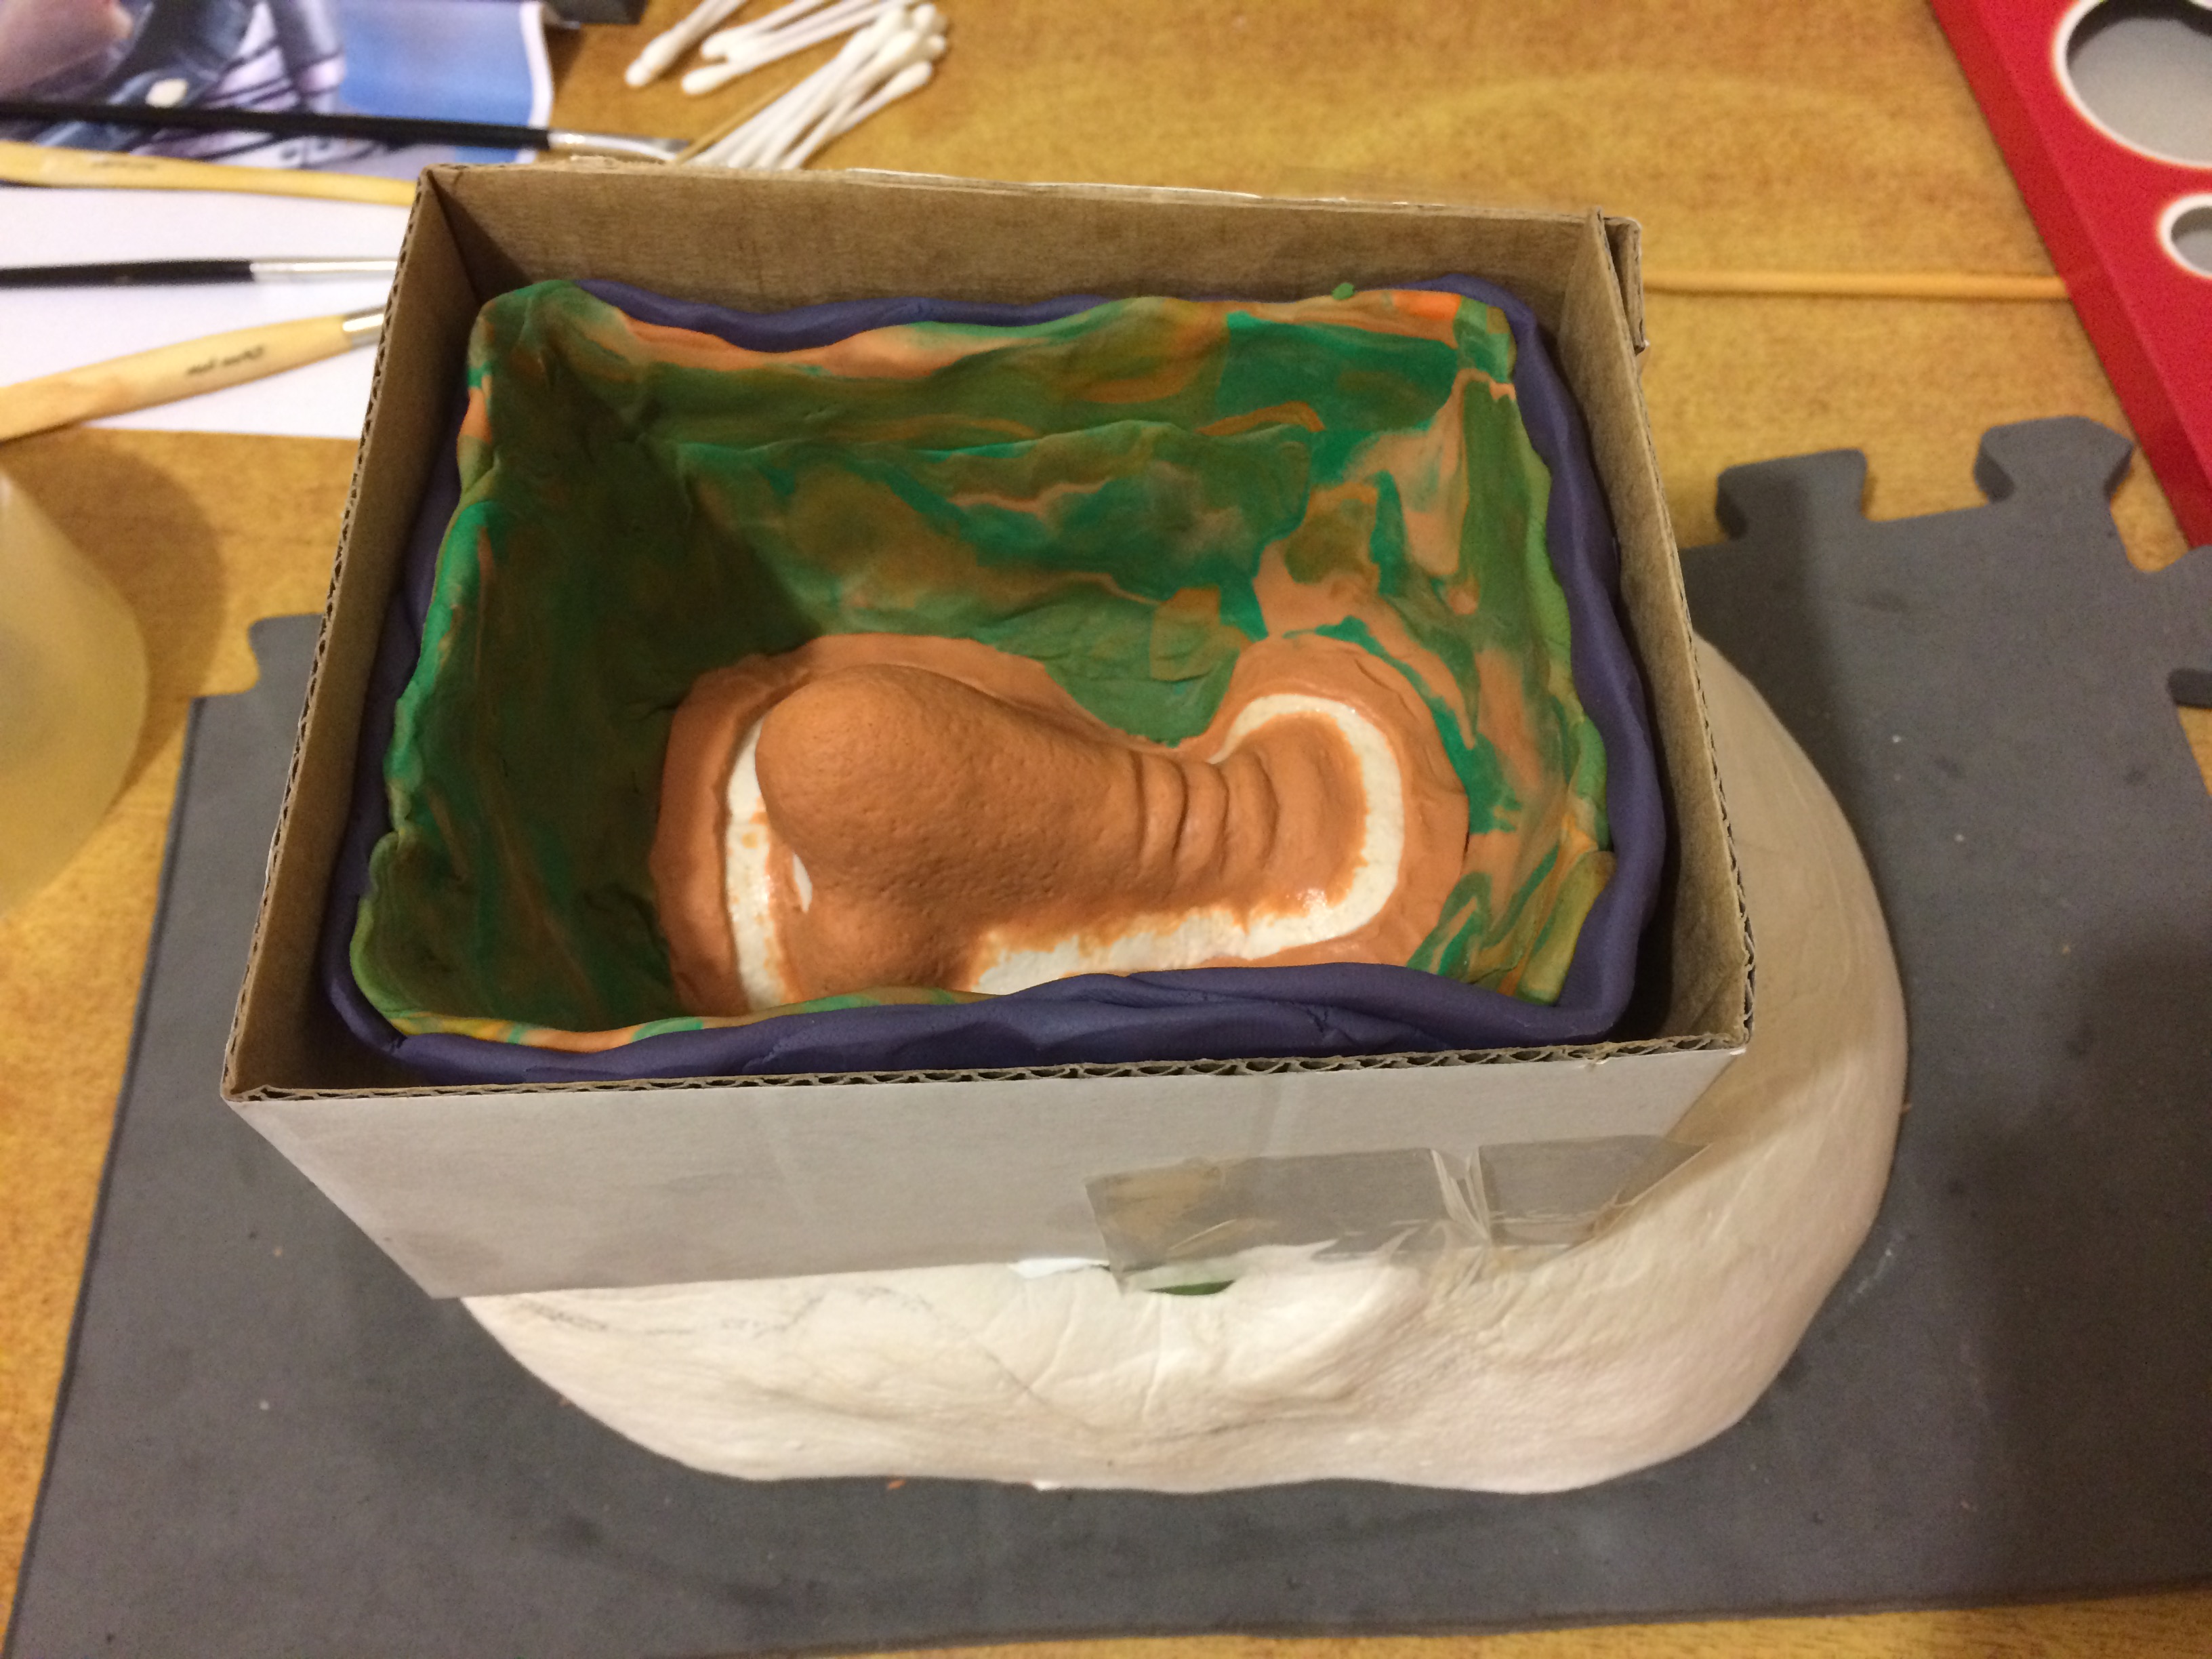
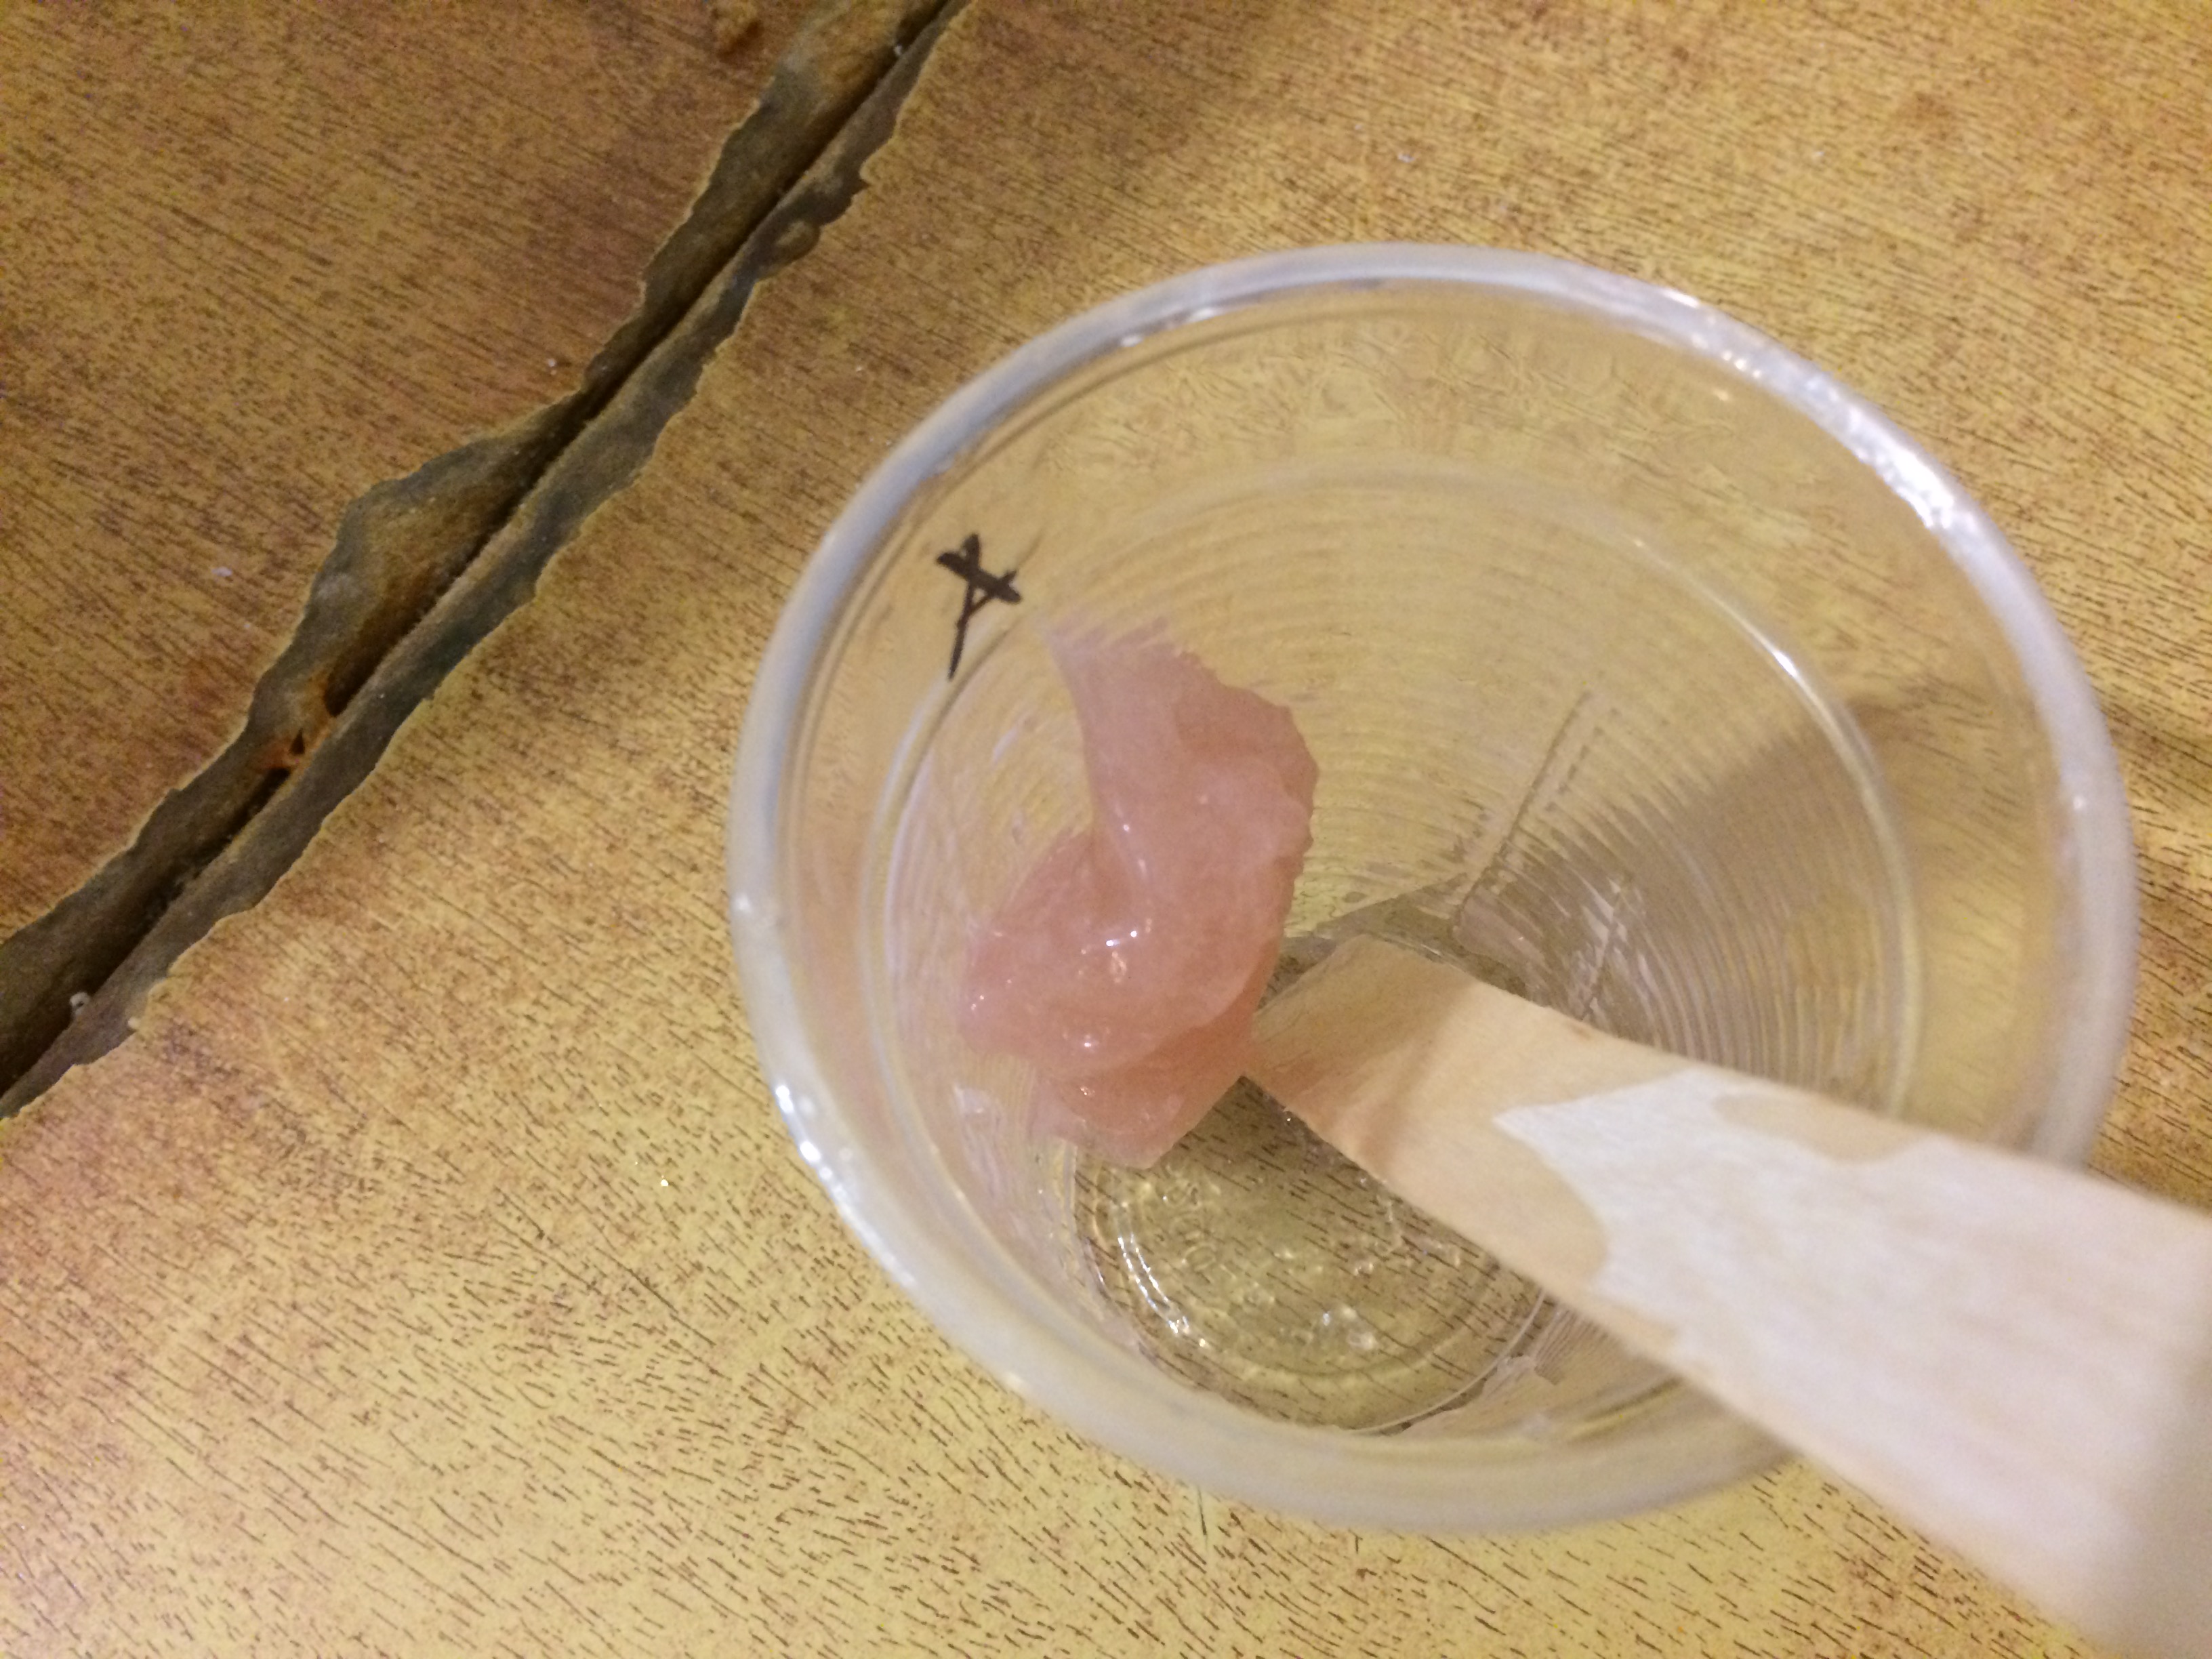
Once that was complete I pored out 20gm of PlatSil Gel-00 A & B into seperate cups and added a VERY small amount of Burnt Sienna & Cream Acrylic paint to Part B and mixed until even color. (It seems Acrylic Paint makes a rather cheap alternative to silicone pigments). Parts A & B were then mixed together and pored in a very fine/narrow stream into the Negative mold until it was 3/4 full (which was about 3/4 of the mixture) Then the Face cast was inserted into the Negative and pressure applied (At one point my entire weight) to help squeeze any large air bubble out and force it out through the ‘blend edge’. This was then left to setup fully (Platsil has a 6 min work time, 30-60 demould – I left it 5 hrs due to work )
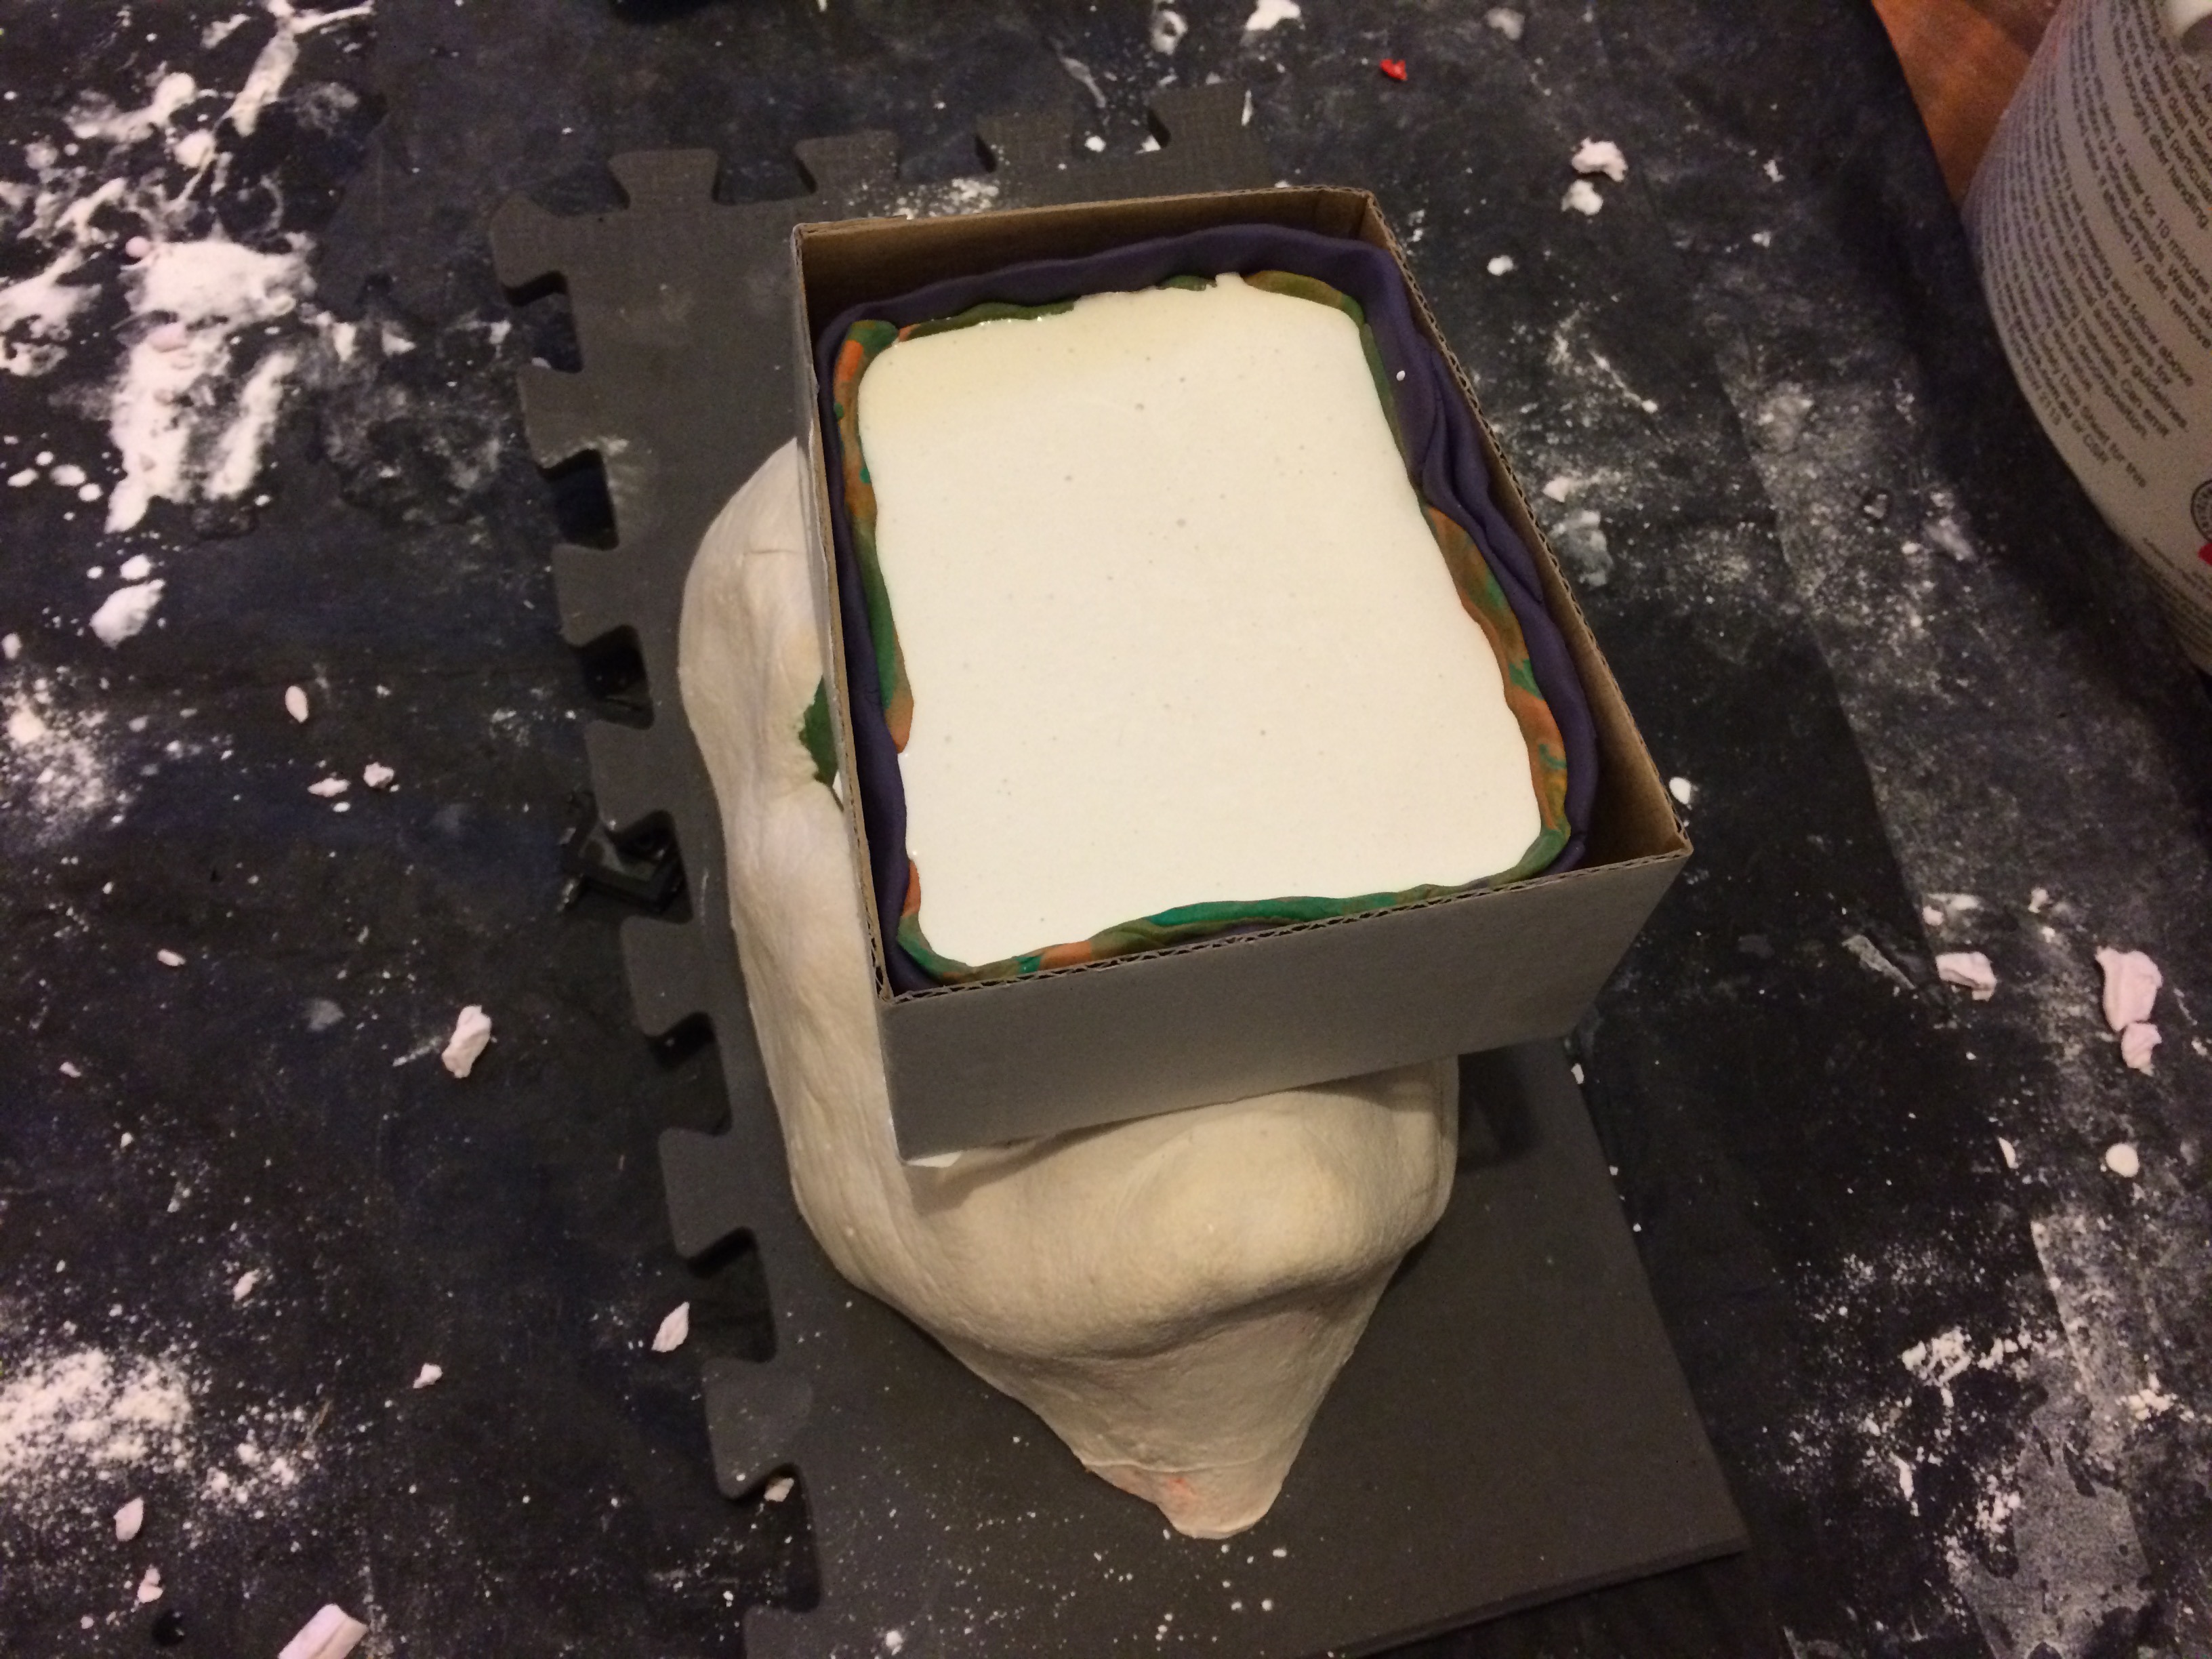
 Excess Platsil after 45 minutes.
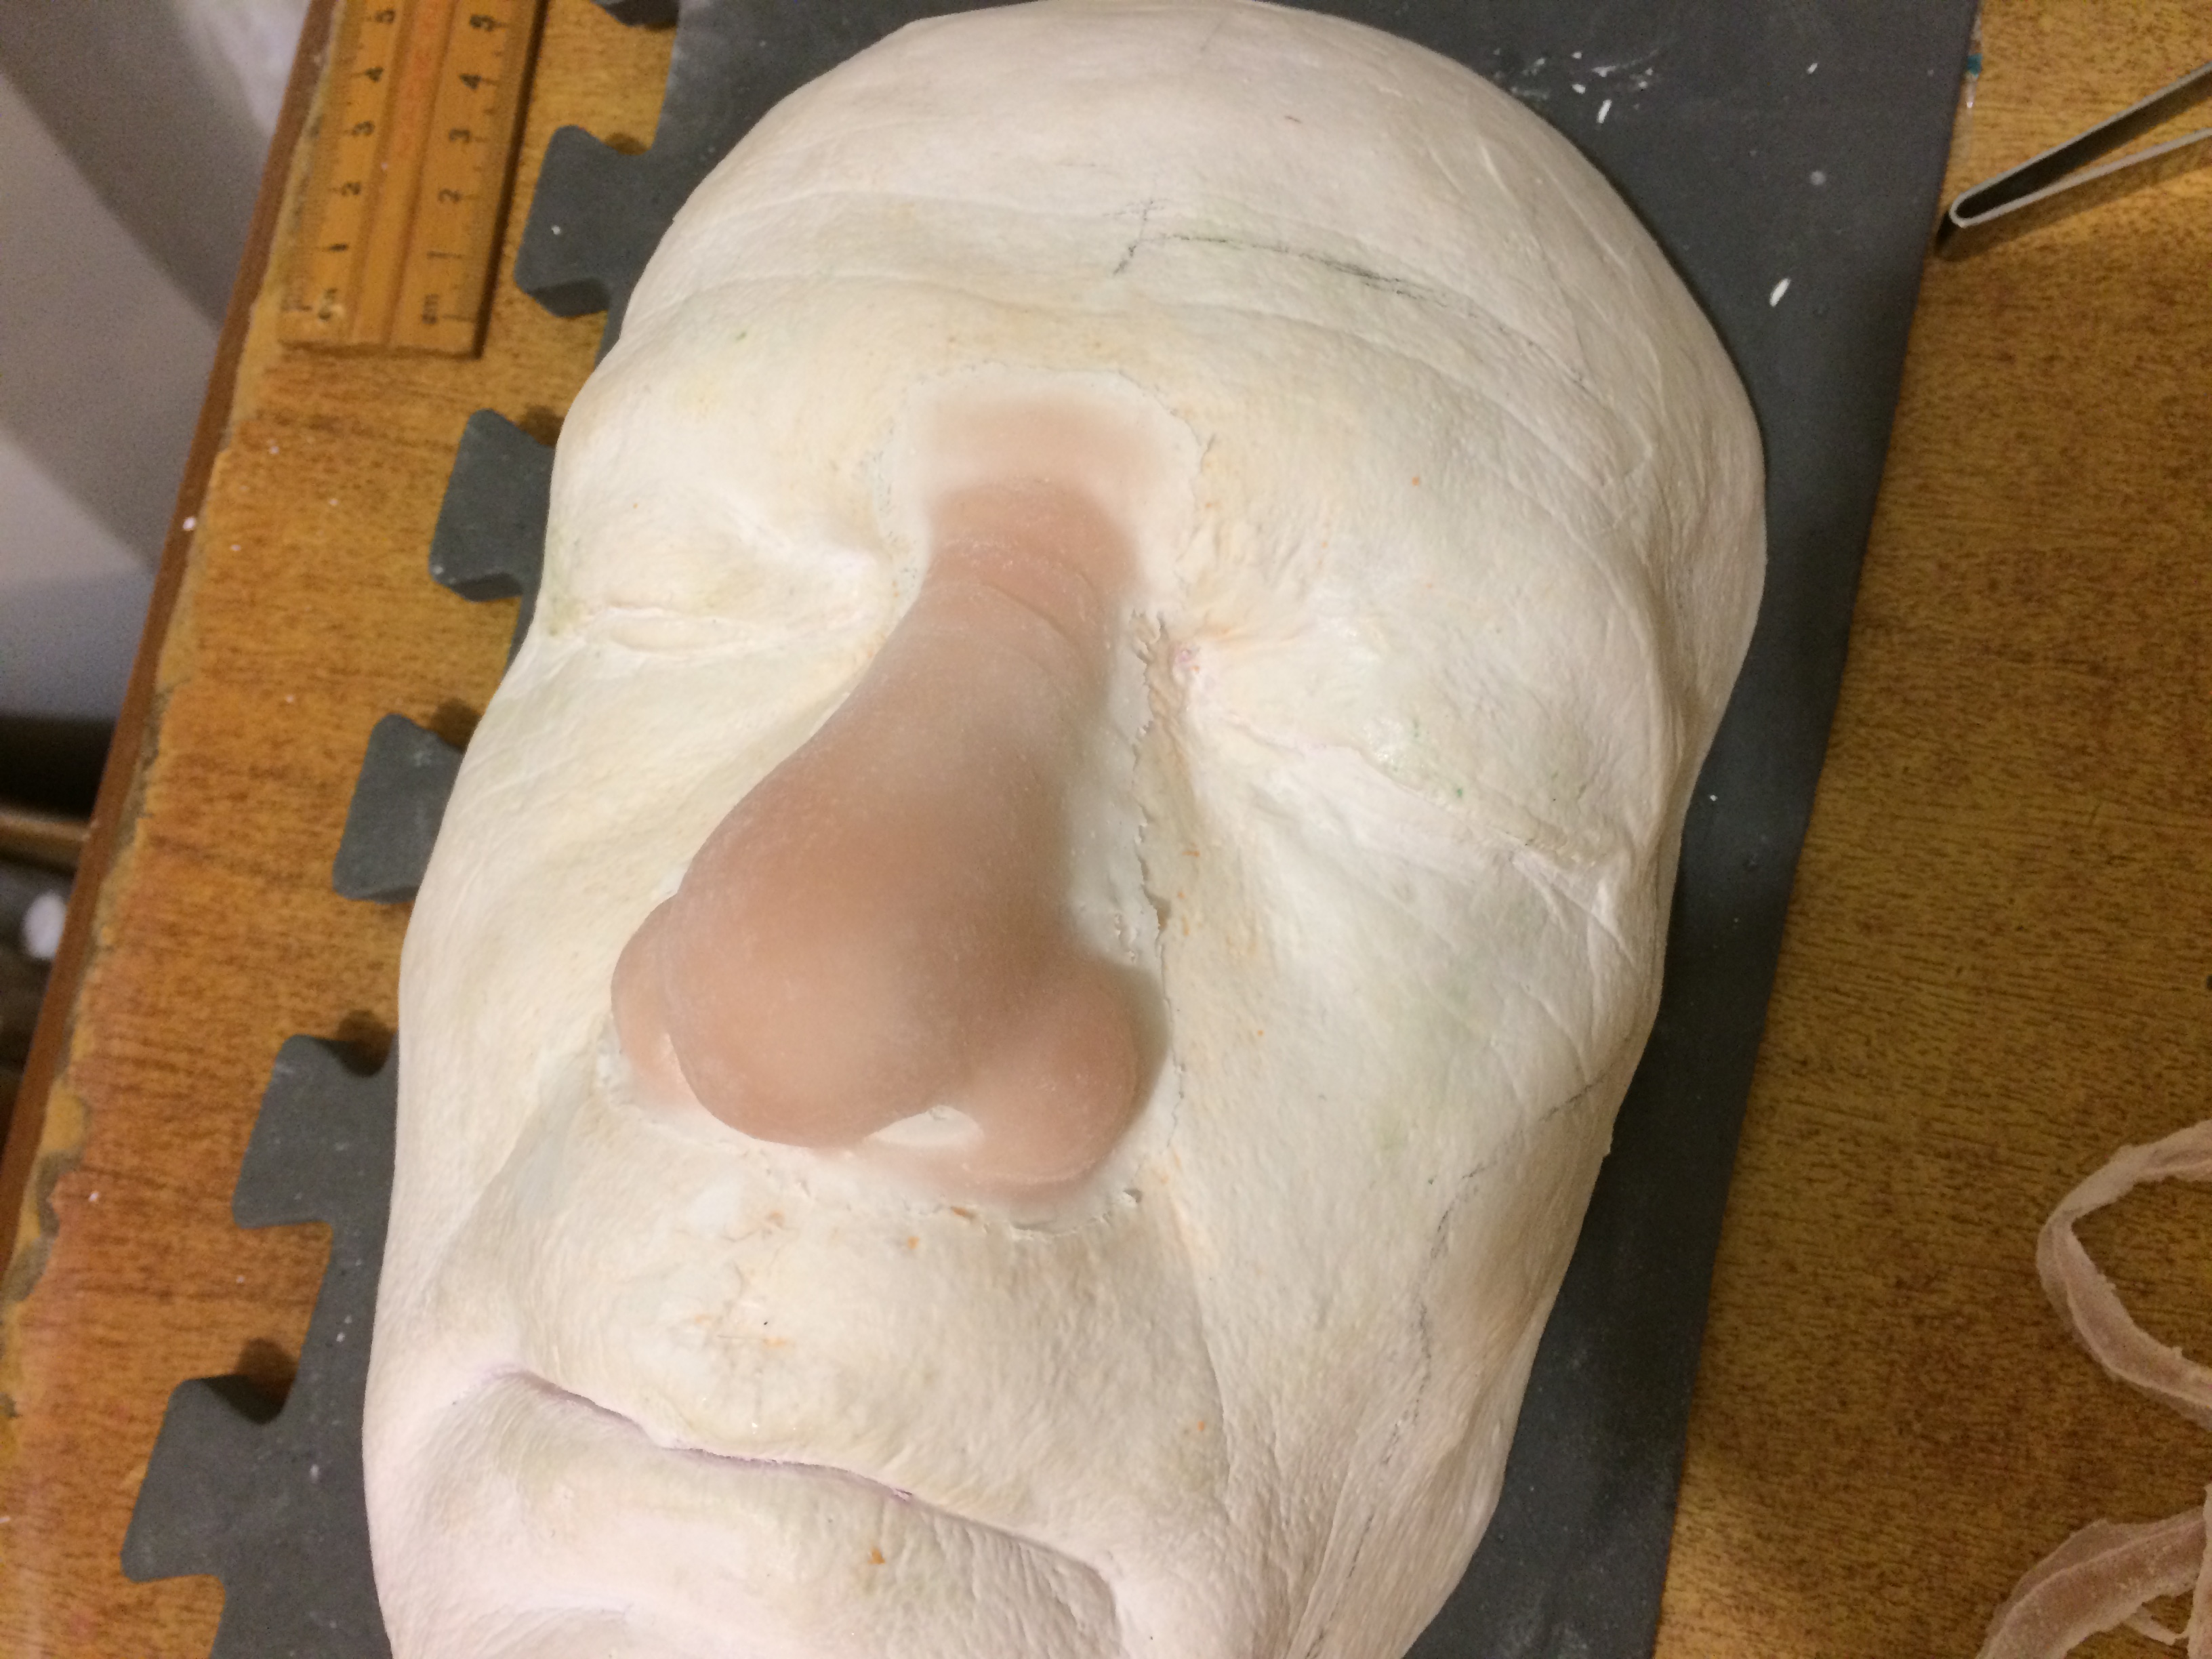
The Demould
It seems the Vaseline method as a release agent works amazingly well. VERY little effort was required to remove the Negative with appliance inside from the Head cast.

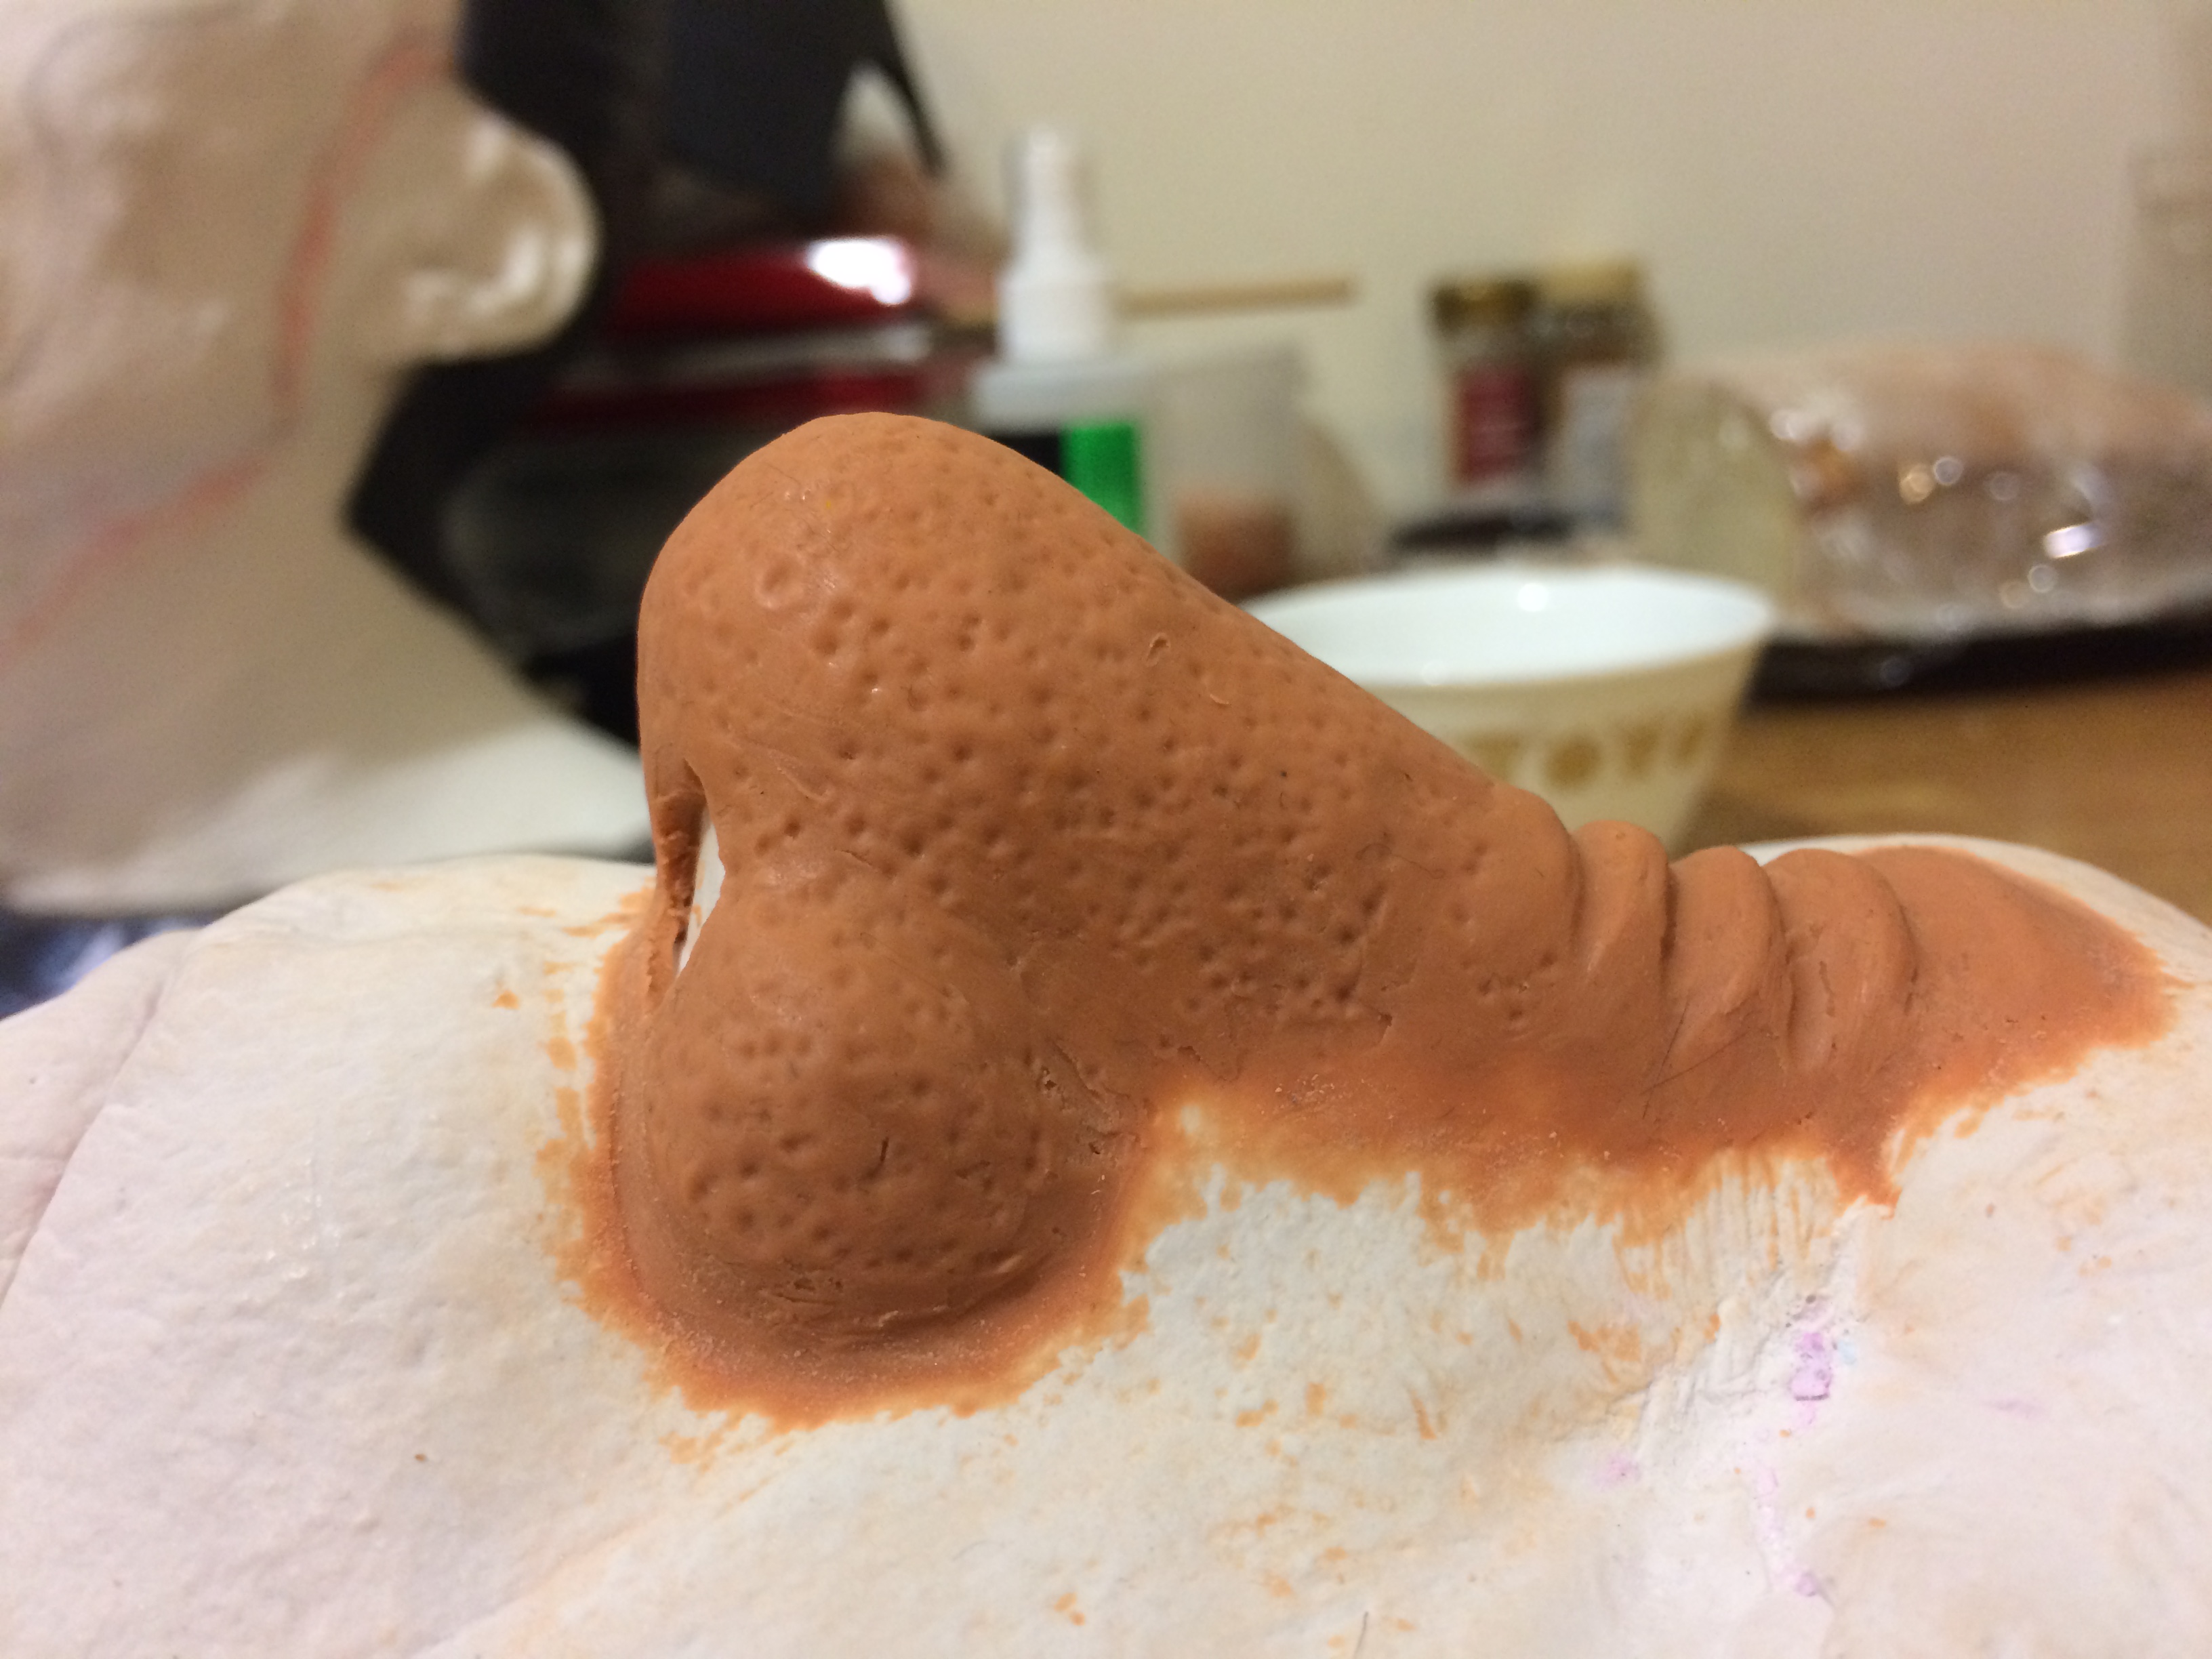
The flashing on the outside peeled away with no effort at all. The silicone was then given a light dusting with cornflour before removing it from the Negative.

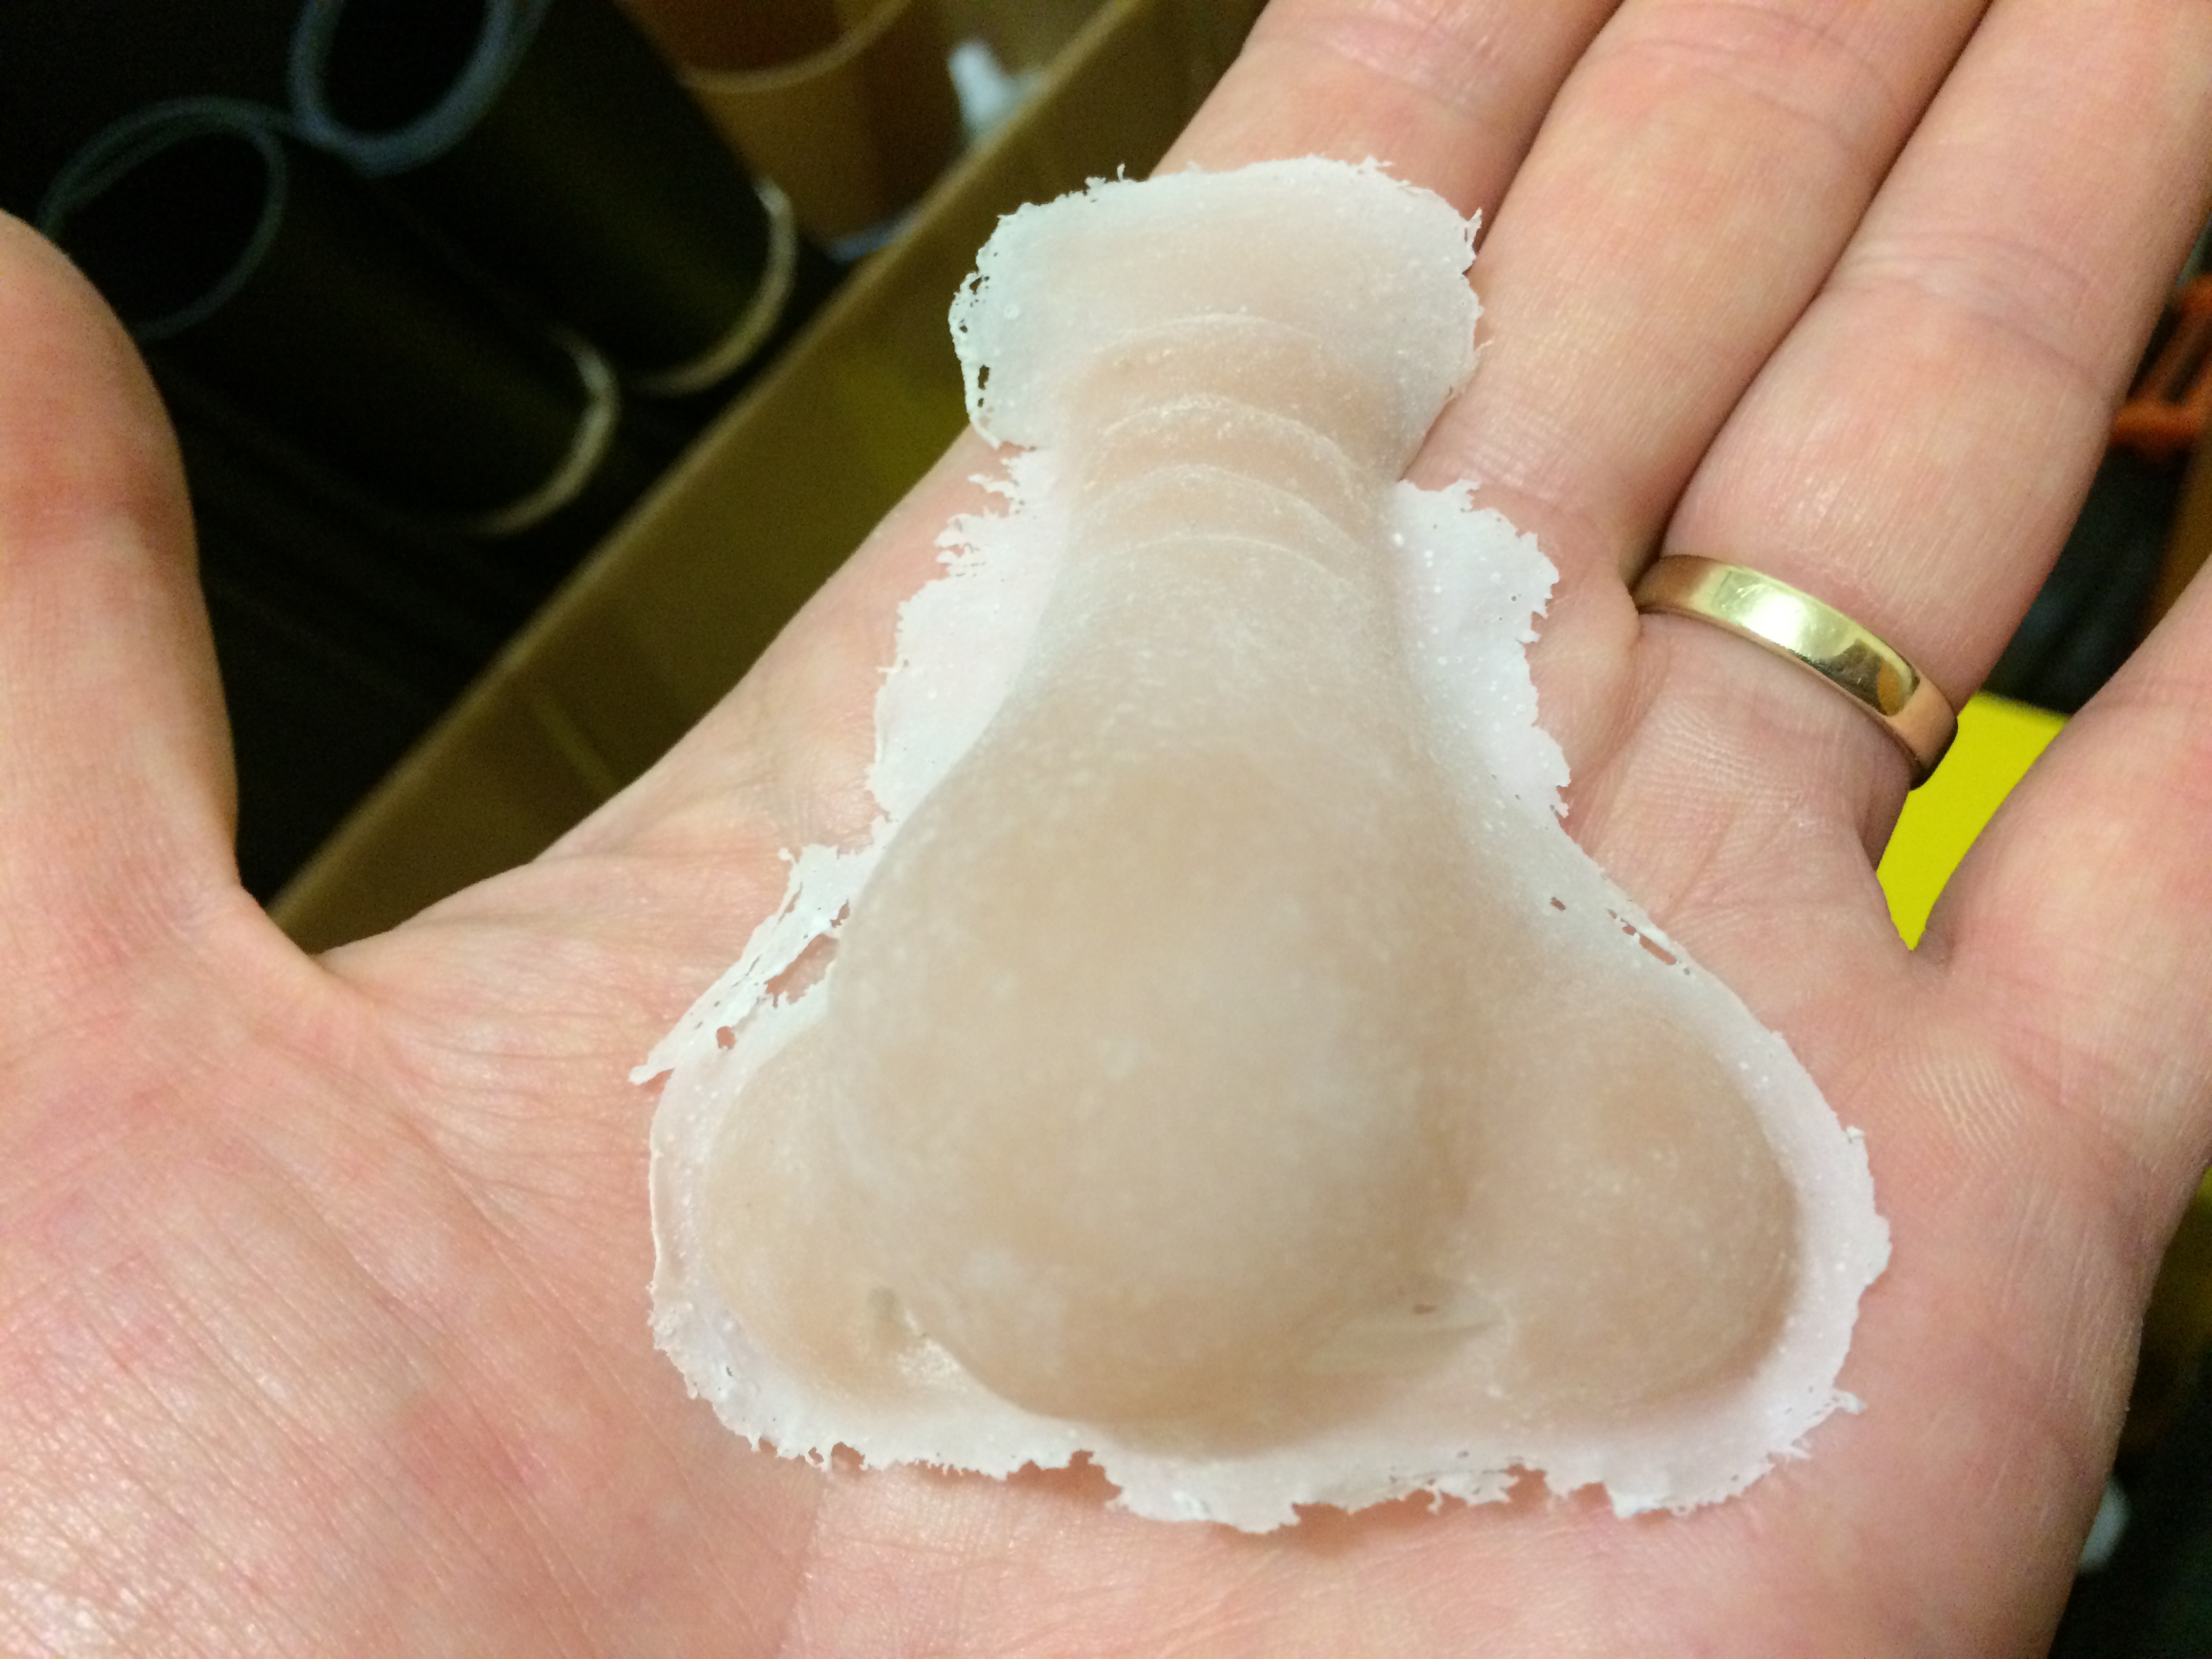
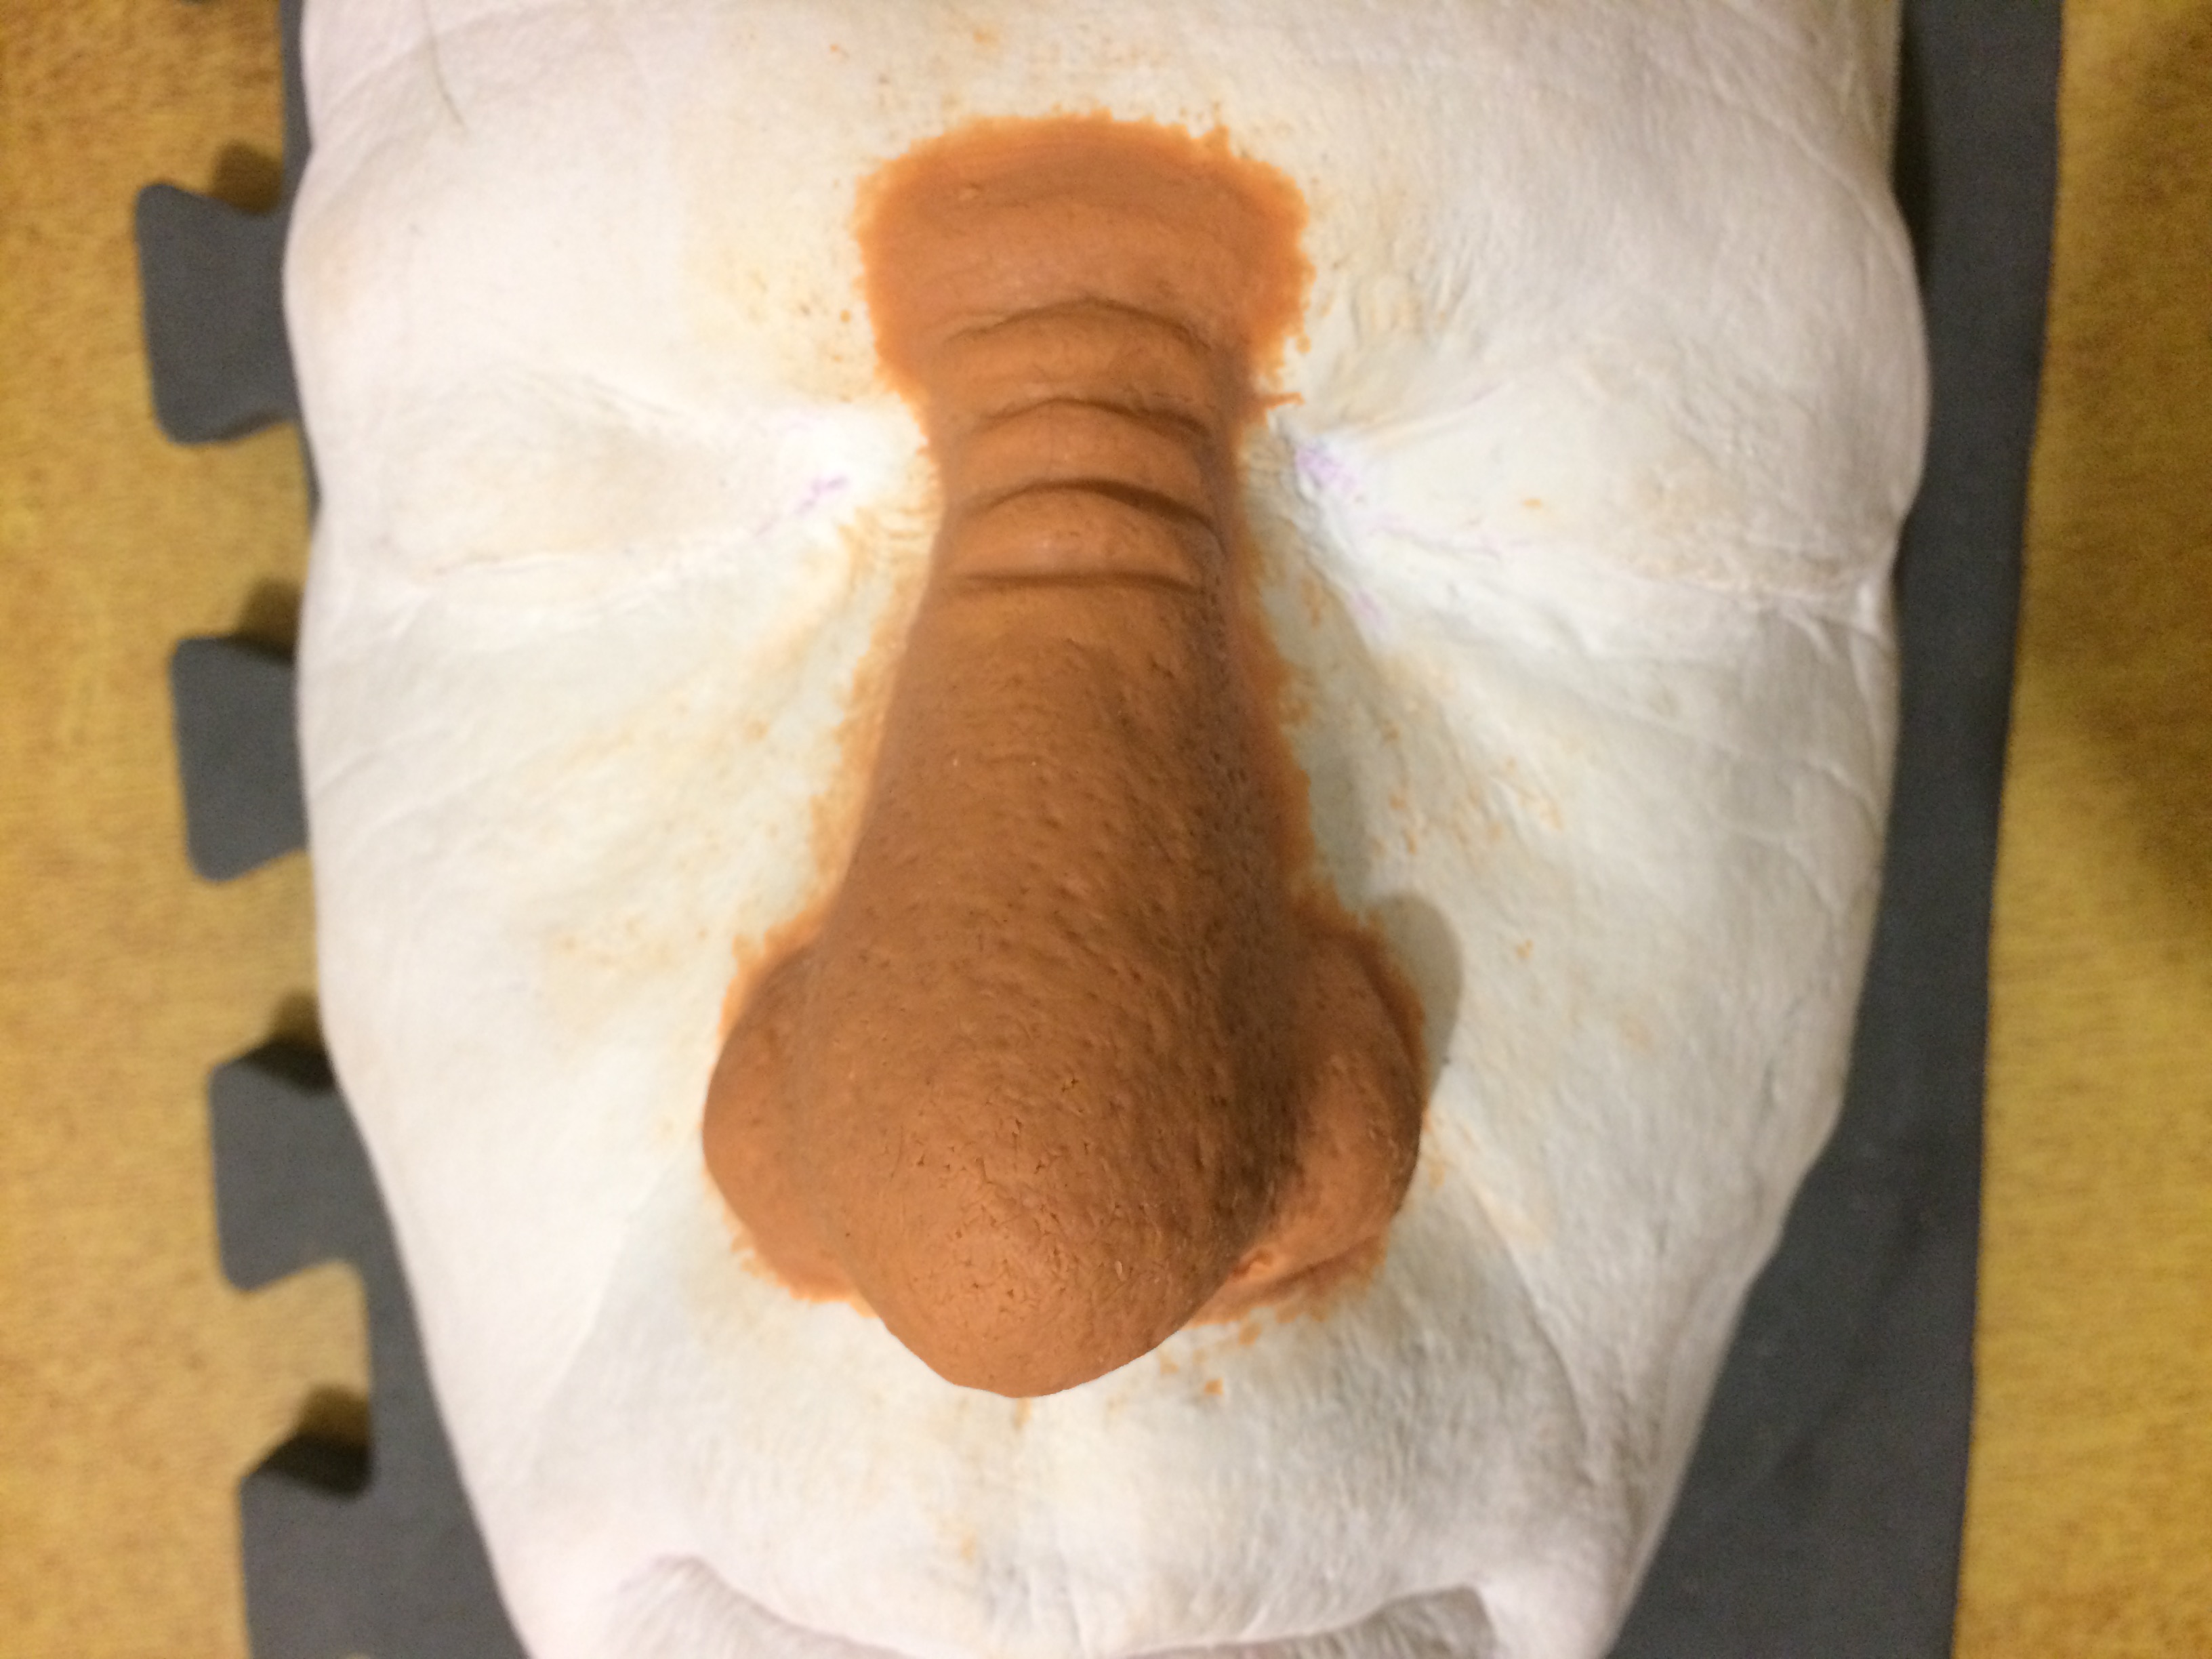
With very little effort, and dusting with cornflour and a soft makeup brush as I proceeded, the entire nose appliance came out very easily.
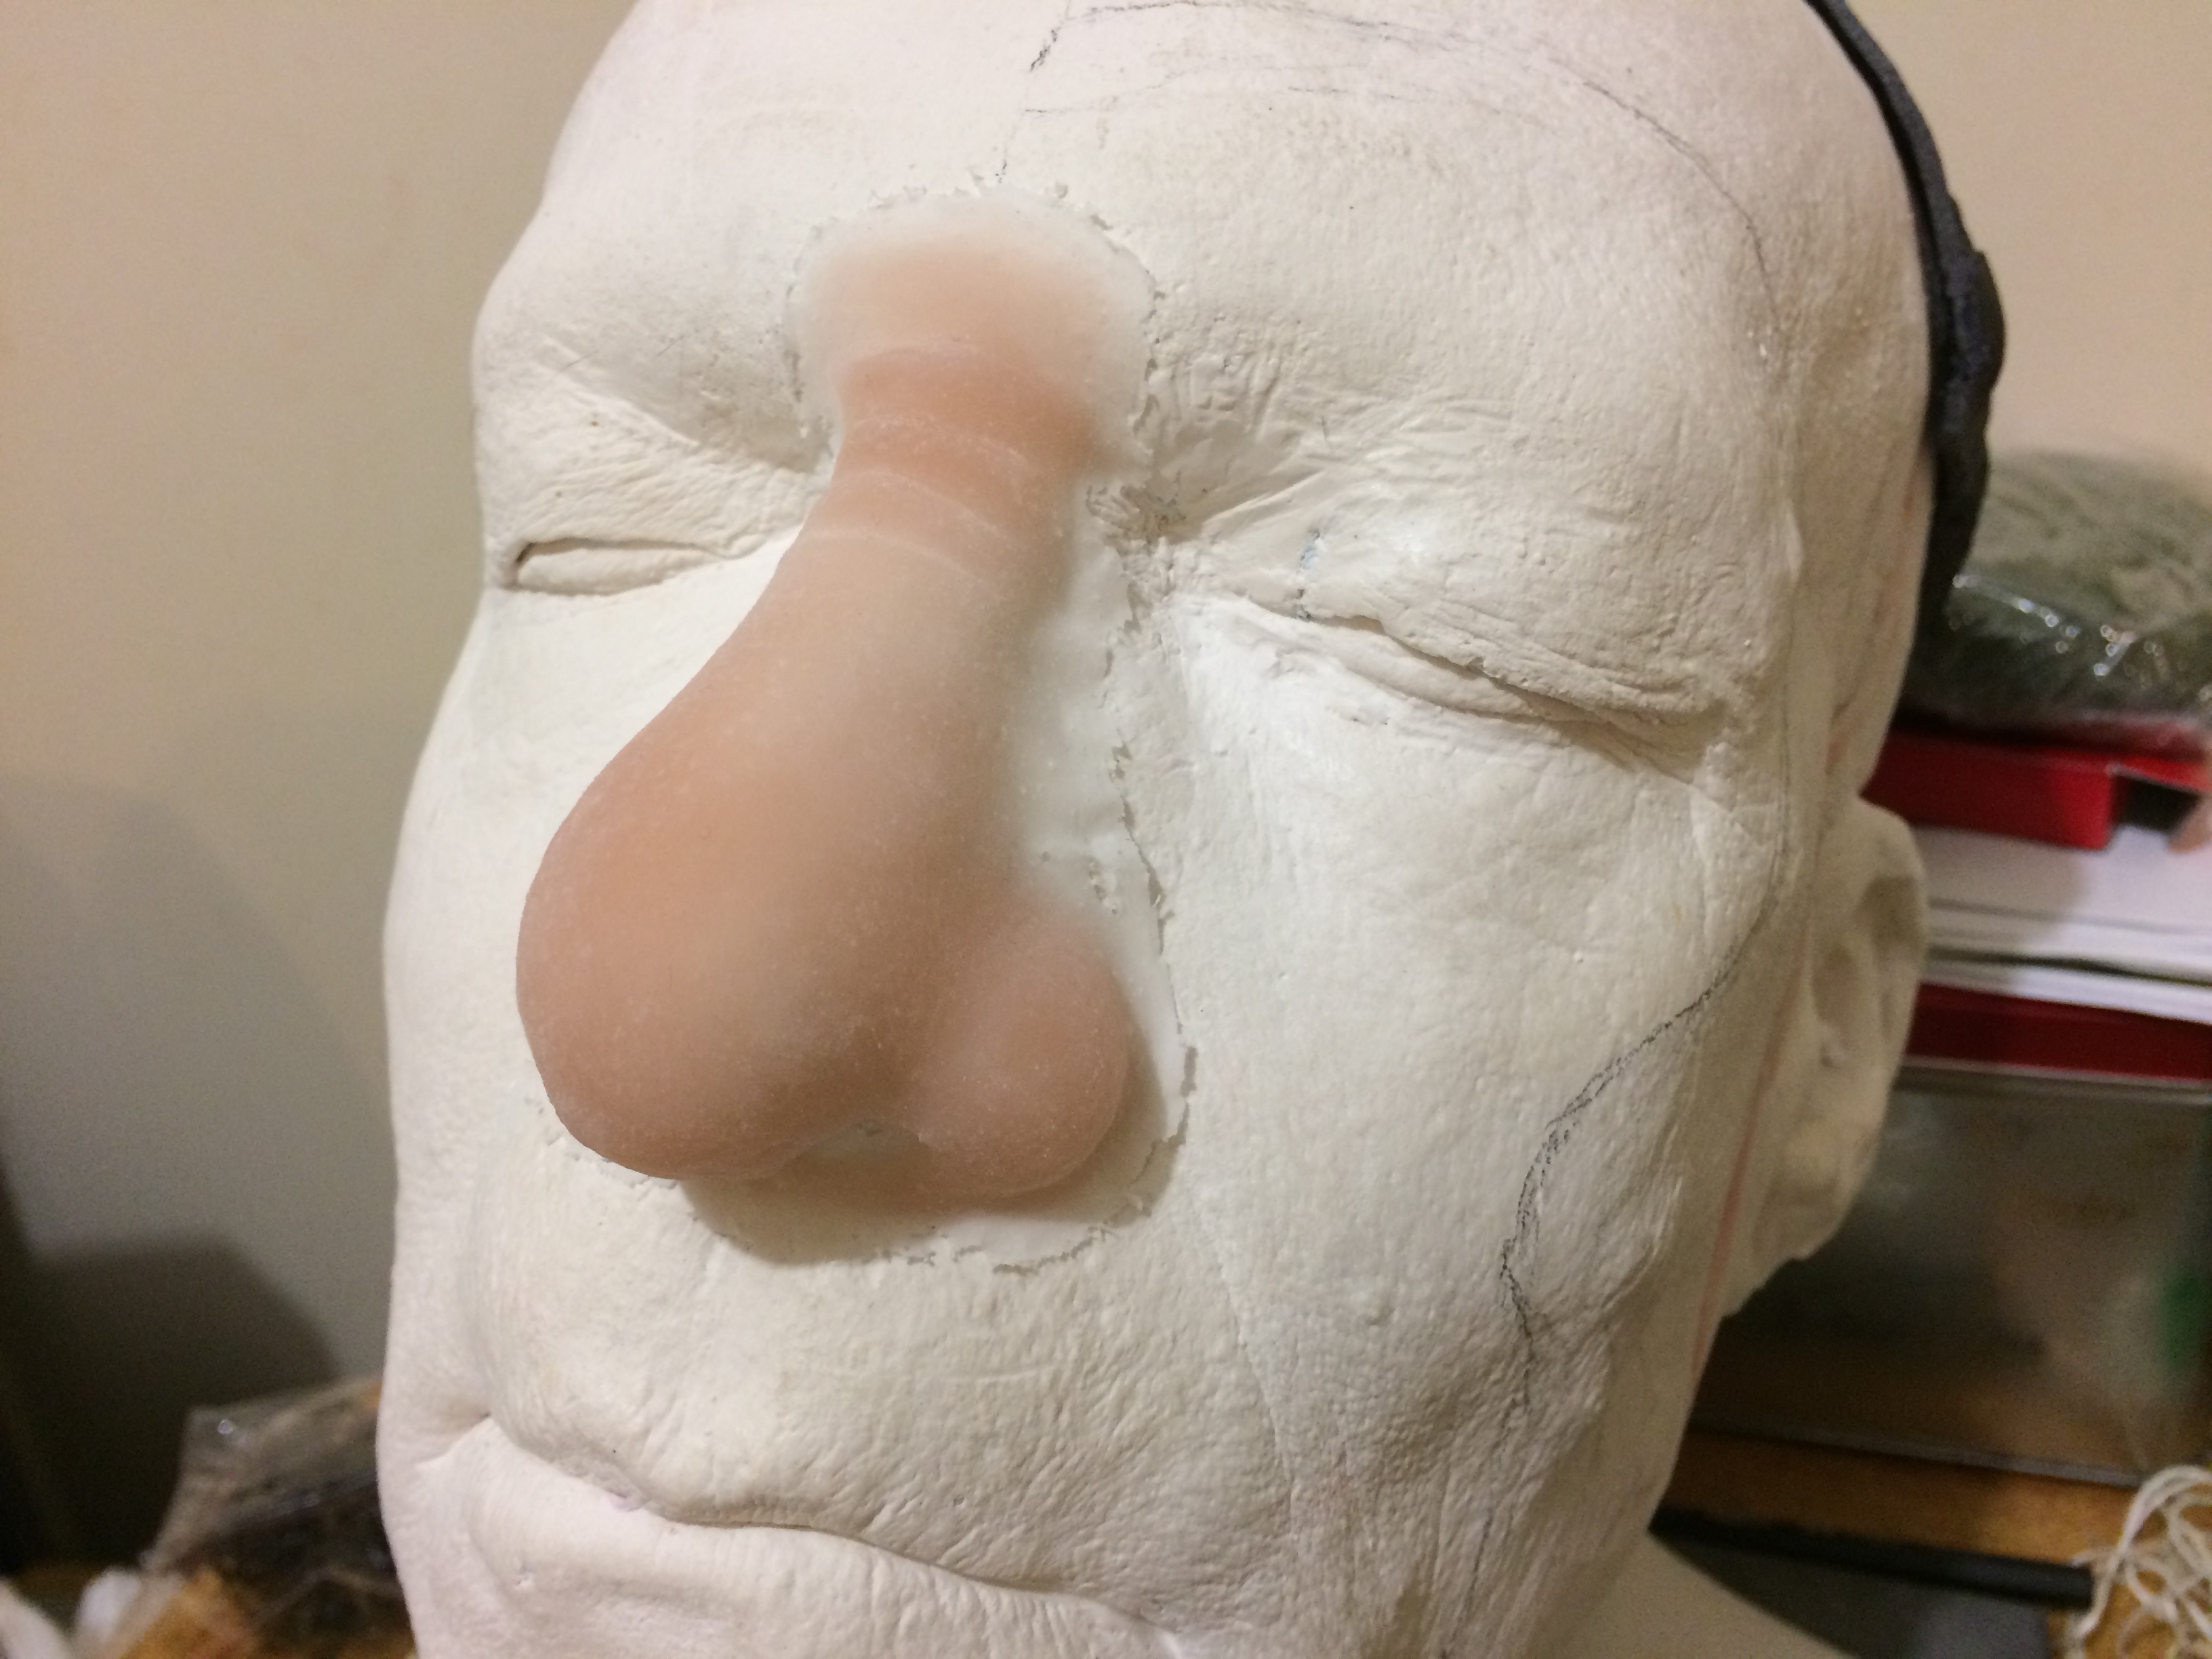
Unfortunately the skin color is not right. It looks ok in this image as the background it white – but when places on the palm of my hand the color contrast is very noticeable. It also looks too ‘dead’ as there is not enough natural mottling that skin has (I have the pigments and flocking for this coming as I write this article). However – for a very first test cast I am ecstatic with the result.